

Getting started with ESP8266 WiFi Module
This article has been migrated from my original post at embeddedinn.wordpress.com.
I recently purchased an ESP8266-03 module from hacktronics for ₹549/- and was pumped up by the fact that I can WiFi enable virtually any of my microcontroller projects with a spare serial interface, at a very small cost. But, Little did I know that it was just the tip of the iceberg.
However, First things first – How to get started with the module?
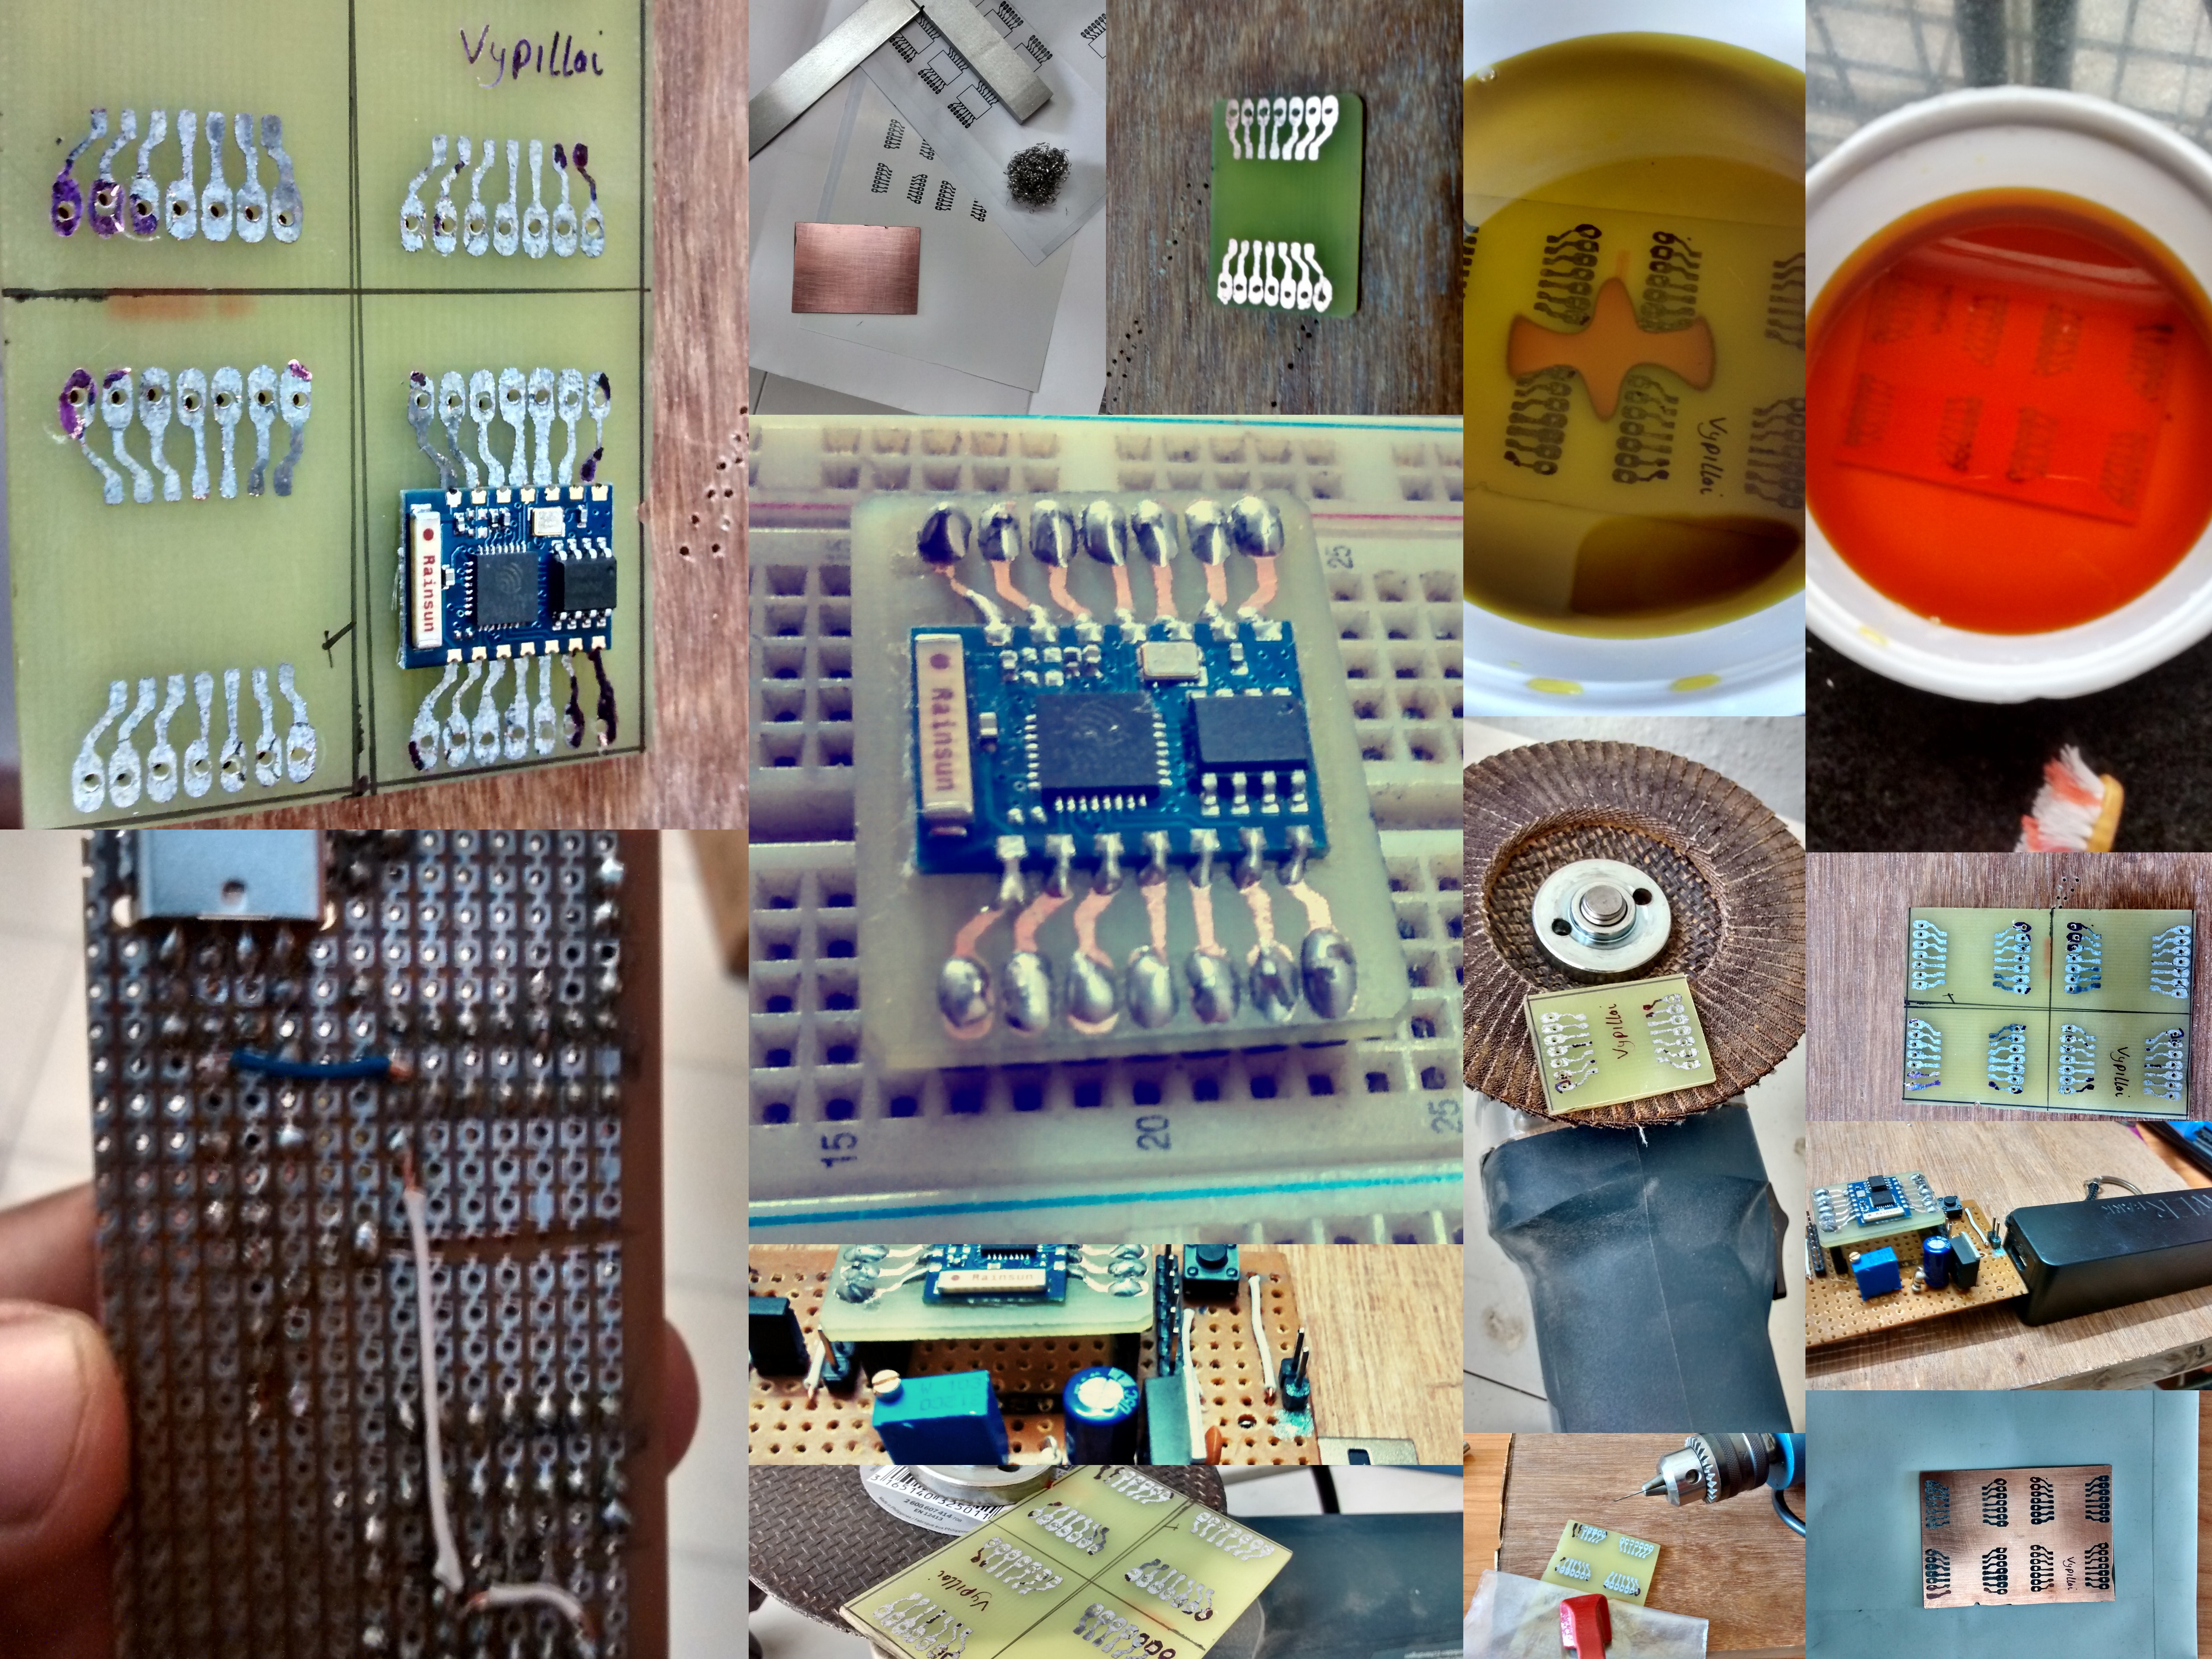
The main problem that I faced initially was the non-breadboard friendly package. I deliberately went for the V03 since it has more GPIOs exposed, and it has a chip antenna. But, the pitch was 2mm as opposed to the 2.54mm DIP package pitch. So, I designed a breakout board to make it usable.
Once soldered, it looks like this:

If you are interested, you can download the toner transfer template here.
If you are interested in making your own board at home, follow my tutorial here.
Here is a collage of the steps I followed for this board (out of vanity :smile: )
The board needs some minimal connections to get started. I followed the schematic from Scargill’s post here.

After getting used to the comforts of Arduino and Raspberry Pi, I found it irritating to work with wires dangling around from the breadboard. So, I made a home for the spider in a vero board.
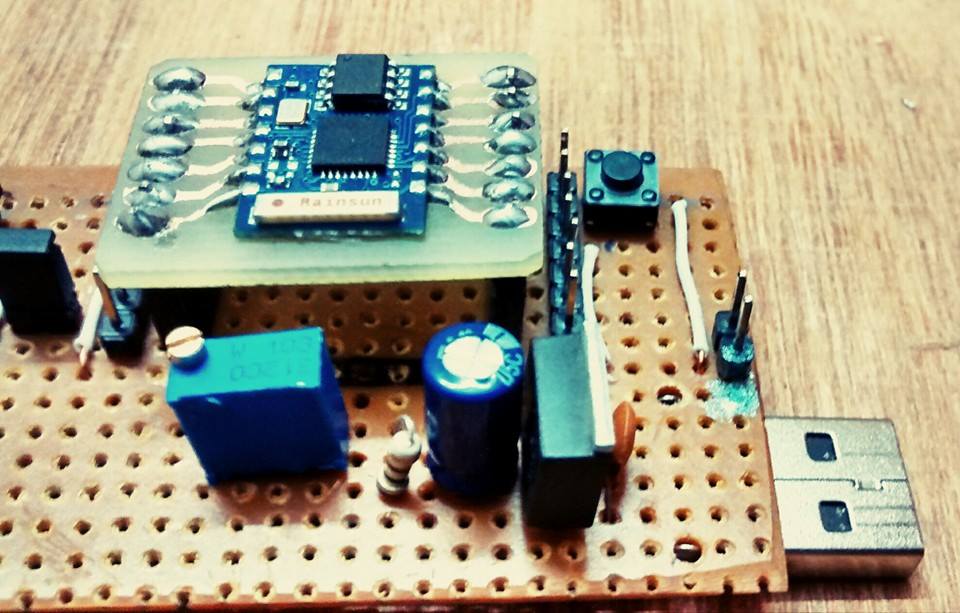
This board has the power control circuitry to convert 5V supply form the USB plug into the 3v3 supply required by the module. It also has some jumpers and switches to enable power saving modes and programming modes. It is all as per the circuit provided in the above diagram.
Next step is to check if the module’s original functionality of “serial to WiFi” works fine. I connected the module to the serial port (over USB) of my laptop and issued some AT commands as given in the official documentation.
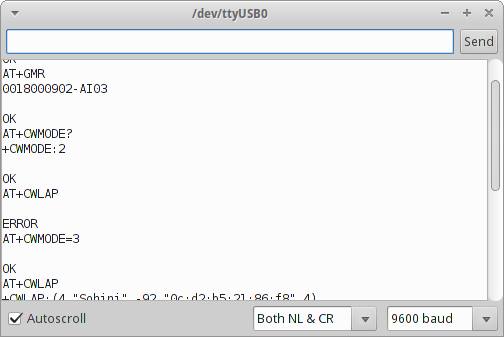
The module responds, I can connect to my home WiFi router, fetch HTML pages and I am all set .
Once this is done, I read through a lot of documentation and tutorials to setup an SDK and compilation environment to start writing standalone programs for the module . After a lot of trouble, I was able to setup a stable environment . I have put up the instructions in Github so that you can start coding in 5 minutes .
I used this environment to compile the official IoT_Demo from espressif and was able to control a LED over WiFi with curl Commands.
I will be doing more experiments after the holiday season on the standalone functionality of the device and try to setup a more transparent http server. Once I am done, I will publish a detailed programming tutorial for the module.
Happy holidays! Cheers!


Leave a comment