

Using Jenkins with BitBucket Webhooks on AWS
Bitbucket lets you trigger webhooks for git events that are interesting to your build and test infrastructure. In the past, I have played around with it using ngrok and python flask “servers.” This article summarizes my experience trying it out on Jenkins in AWS.
Webhooks are more efficient than a regular Jenkins pipeline since it is triggered only in case of a change instead of a periodic poll/scan by Jenkins.
Setting up Jenkins in a Docker container.
Using the official Jenkins Docker image is the easiest way to get started – especially while exploring what the possibilities are.
The primary documentation for setting up Jenkins in docker is at https://www.jenkins.io/doc/book/installing/docker/.
Following the official instructions, we can set up a Jenkins docker within another docker that hosts the actual contents. This approach is called Docker in Docker, a.k.a. DinD. It allows us to recompile the actual docker container that includes the Jenkins LTS version multiple times without losing configurations we do along the way.
The following steps are just a snapshot of what I did following the official documentation. There are additional steps here since I am setting it up on a fresh EC2 instance.
-
Update the system and install Docker. (Instructions from https://docs.docker.com/engine/install/ubuntu/
sudo apt-get update sudo apt-get install \ ca-certificates \ curl \ gnupg \ lsb-release sudo mkdir -p /etc/apt/keyrings curl -fsSL https://download.docker.com/linux/ubuntu/gpg | sudo gpg --dearmor -o /etc/apt/keyrings/docker.gpg echo \ "deb [arch=$(dpkg --print-architecture) signed-by=/etc/apt/keyrings/docker.gpg] https://download.docker.com/linux/ubuntu \ $(lsb_release -cs) stable" | sudo tee /etc/apt/sources.list.d/docker.list > /dev/null sudo apt-get update sudo apt-get install docker-ce docker-ce-cli containerd.io docker-compose-plugin -
Setup a network
docker network create jenkins -
Create the first
DinDlayerdocker run \ --name jenkins-docker \ --rm \ --detach \ --privileged \ --network jenkins \ --network-alias docker \ --env DOCKER_TLS_CERTDIR=/certs \ --volume jenkins-docker-certs:/certs/client \ --volume jenkins-data:/var/jenkins_home \ --publish 2376:2376 \ docker:dind \ --storage-driver overlay2 -
Make sure you install the tools required to run your actual build commands from Jenkins by modifying the
Dockerfilein the official documentation. This is my modifiedDockerfilethat installsmake,python, andpython-venvin the container.FROM jenkins/jenkins:2.346.1-jdk11 USER root RUN apt-get update && apt-get install -y lsb-release RUN curl -fsSLo /usr/share/keyrings/docker-archive-keyring.asc \ https://download.docker.com/linux/debian/gpg RUN echo "deb [arch=$(dpkg --print-architecture) \ signed-by=/usr/share/keyrings/docker-archive-keyring.asc] \ https://download.docker.com/linux/debian \ $(lsb_release -cs) stable" > /etc/apt/sources.list.d/docker.list RUN apt-get update && apt-get install -y docker-ce-cli python3 make python3-venv USER jenkins RUN jenkins-plugin-cli --plugins "blueocean:1.25.5 docker-workflow:1.28" -
Build the docker image with
docker build -t myjenkins-blueocean:2.346.1-1 . -
Now run the new docker image within the
DinDwithdocker run \ --name jenkins-blueocean \ --restart=on-failure \ --detach \ --network jenkins \ --env DOCKER_HOST=tcp://docker:2376 \ --env DOCKER_CERT_PATH=/certs/client \ --env DOCKER_TLS_VERIFY=1 \ --publish 8080:8080 \ --publish 50000:50000 \ --volume jenkins-data:/var/jenkins_home \ --volume jenkins-docker-certs:/certs/client:ro \ myjenkins-blueocean:2.346.1-1 -
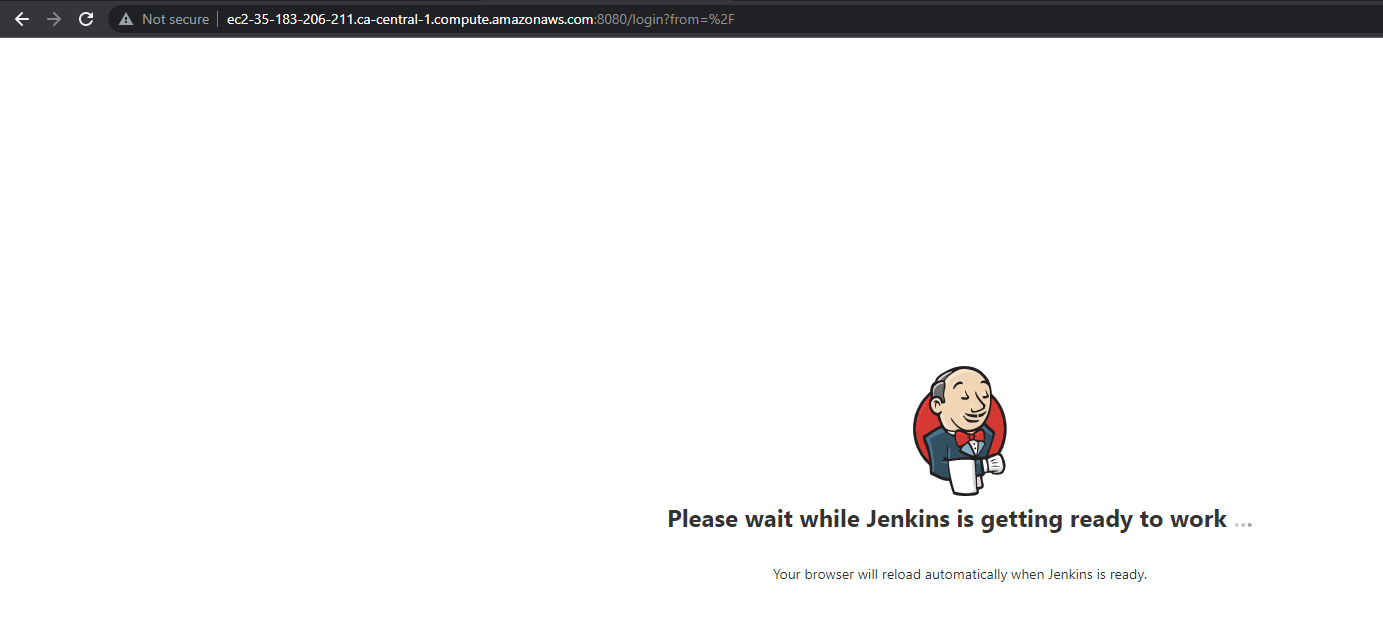
I can now access the Jenkins installation on port
8080using the public DNS / IP.
Jenkins welcome page
Configuring Jenkins
-
To unlock Jenkins, we need to access
/var/jenkins_home/secrets/initialAdminPassword. For that :docker exec -it jenkins-blueocean bash cat /var/jenkins_home/secrets/initialAdminPassword And then paste the password in the web console.
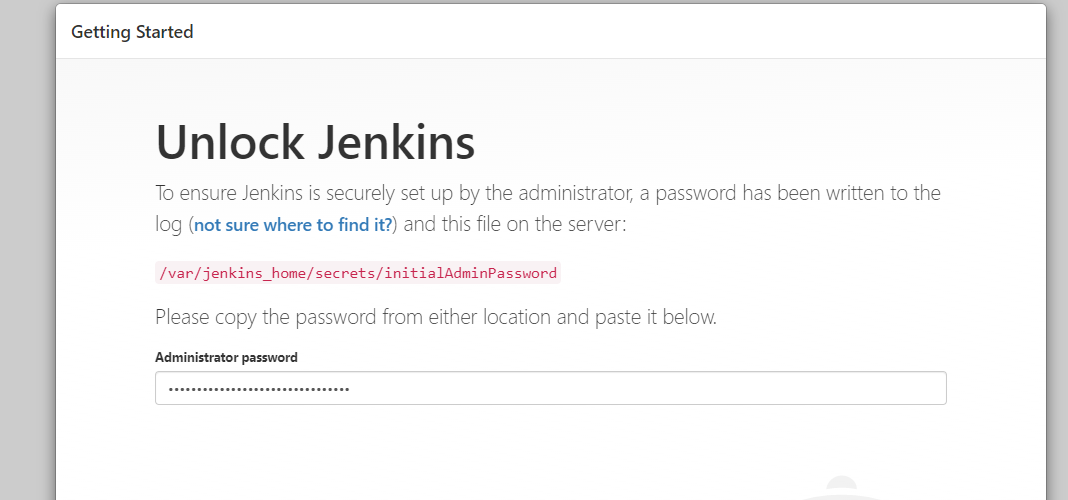
Unlocking Jenkins
- Next, install the recommended plugins
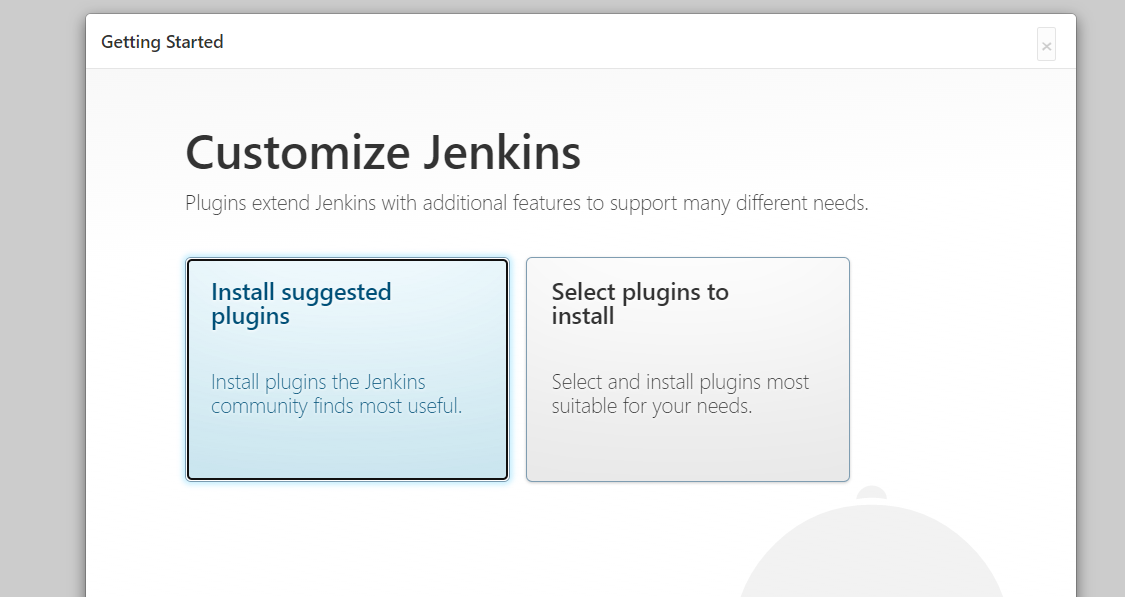
Recommended Plugins
- And create an Admin User.

Create Admin User
-
After logging in to the Jenkins page and settings up the basic configurations got to Manage Jenkins > Manage Plugins and install the following plugins:
Create a Bitbucket repo
I am using the free bitbucket.org web version for this writeup. However, I have tested this first on an on-premise Bitbucket Server instance.
Creating a Jenkins Job
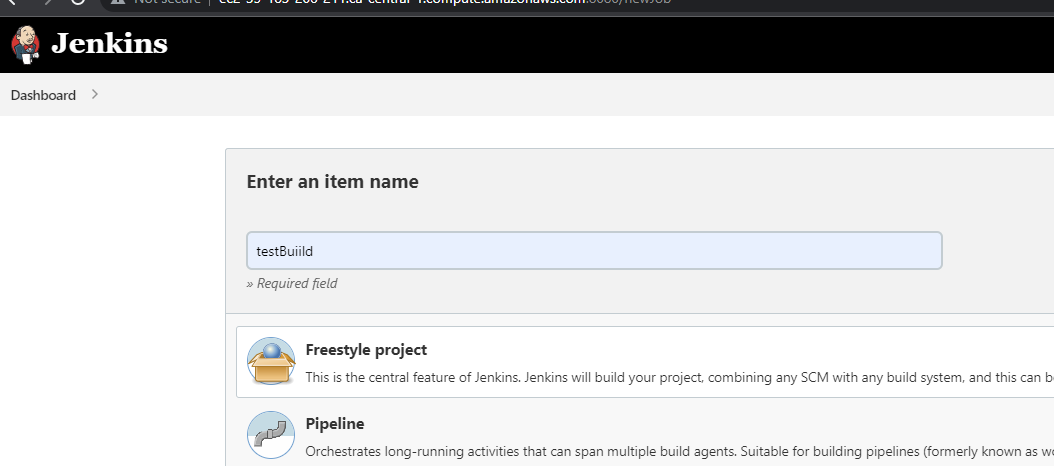
- Create a new Job by clicking on the
New Itembutton in the top left corner.
Create Job
- Select FreeStyle Project from the list.
Select FreeStyle Project
Configuring the Job
After the job is created, go to the job configuration page.
-
Under the
Source Code Management tab, selectGitand enter details of the repository you want to build for.-
Make sure you also set up credentials for the repository. We will use this in the server notification step as well. I am using a bitbucket app password with repo read permission. You can also set up a personal access token or private key.
-
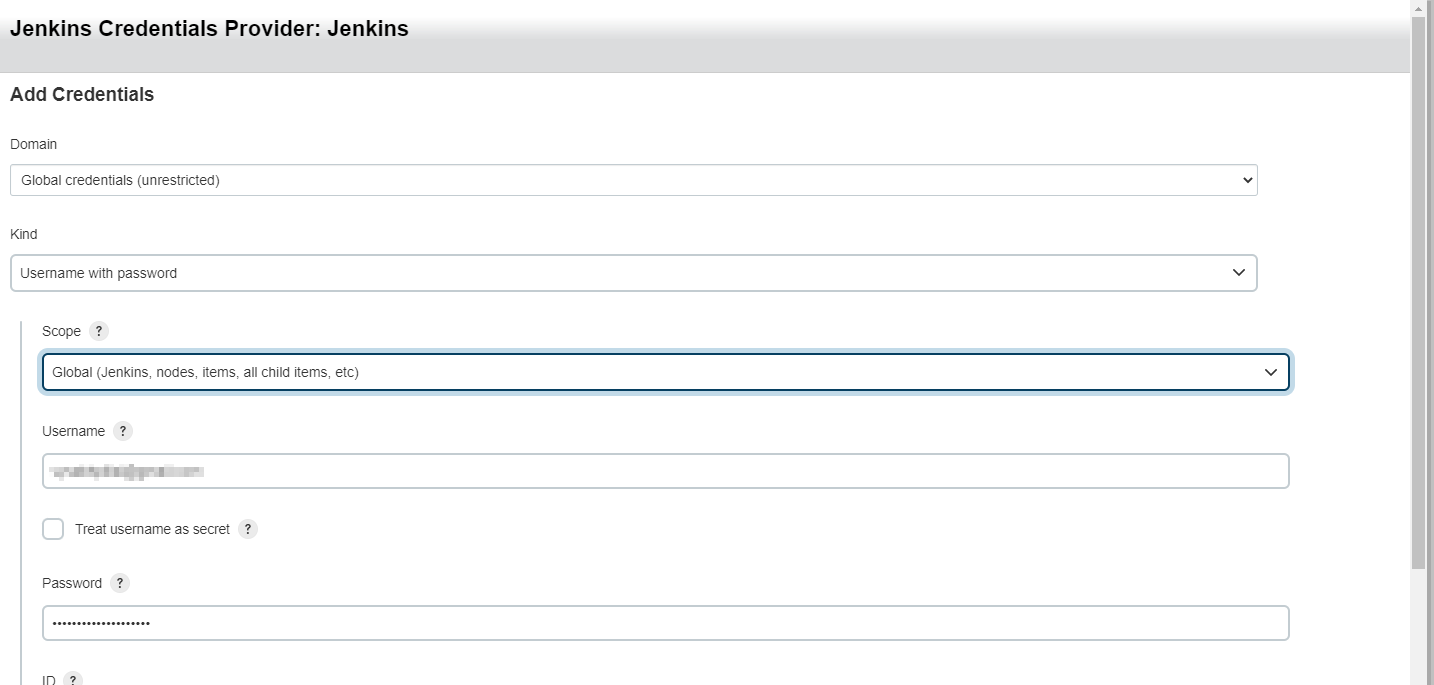
Setup Credentials
-
For branches, select
*since we will be building for changes in all branches. This can further be filtered for your use.- We will obtain information about the specific branch that triggered the job in the next step.
-
Under repository browser, provide the
repo View link. This will help us quickly navigate the code corresponding to a build Job. In this case, I am using a test repo inbitbucket.orgto play around with the Jenkins setup. So, I selected bitbucket web.
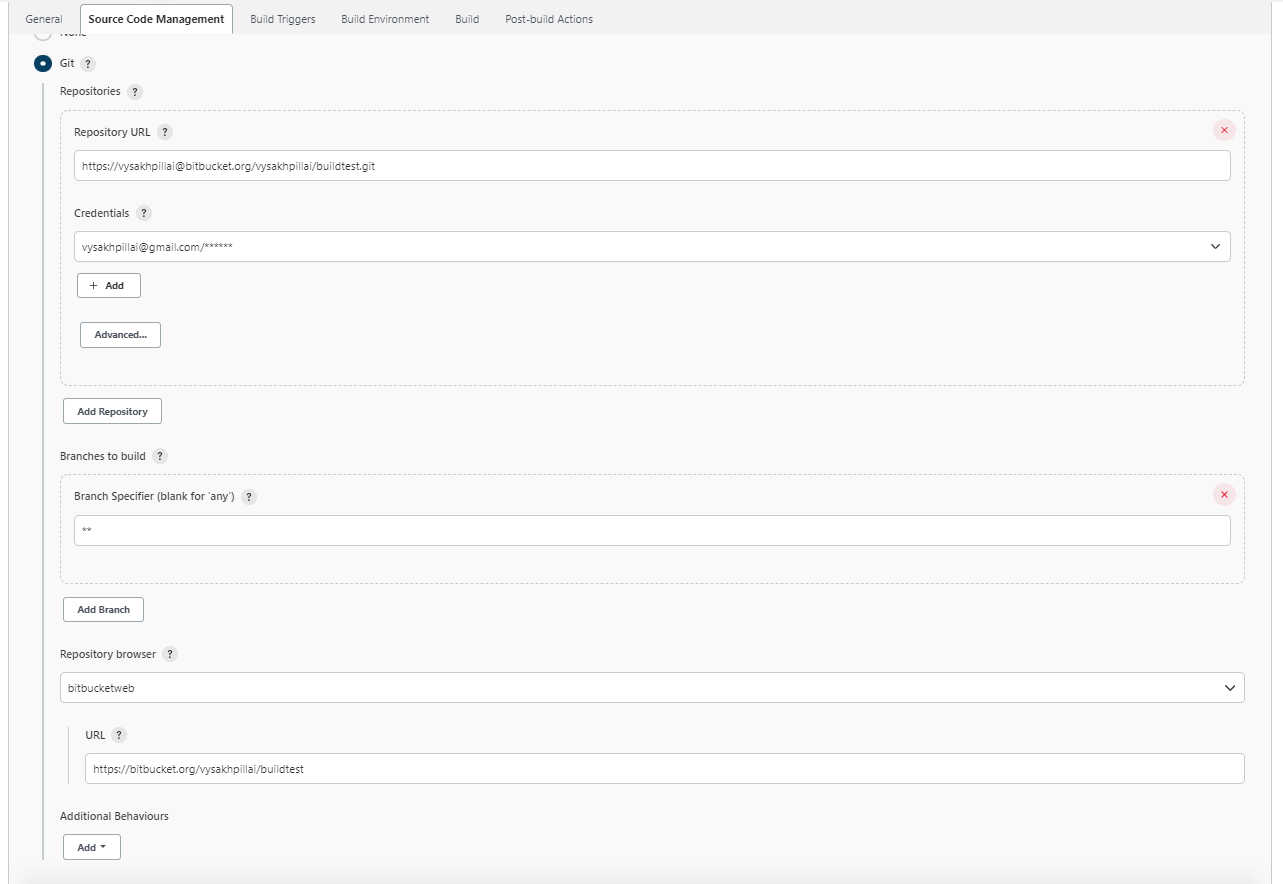
SCM Configuration
- Under build trigger, select Generic Webhook Trigger.
- Make a note of the webhook URL format
http://JENKINS_URL/generic-webhook-trigger/invoke
- Make a note of the webhook URL format
- Under token, enter a
GUID. This will be used to distinguish build triggers coming from the server.- I am using the
uuidgenLinux command for this. You can also use https://www.guidgenerator.com/online-guid-generator.aspx or provide a random string.
- I am using the
-
For now, we will keep the cause as a
Generic causeand revisit this later in the next step. - I am just running an
lsshell command for the build step. The actual build steps will be project-specific.
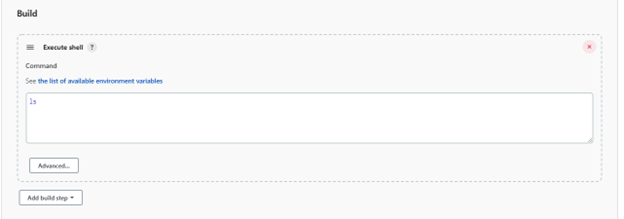
Test Command
-
For the time being, we will leave the post-build action empty. We will revisit this in the next step.
-
Save the job and trigger a test job with the
build nowbutton. This will start a clone of the repo and run the test command. Steps can be observed in the job result console output
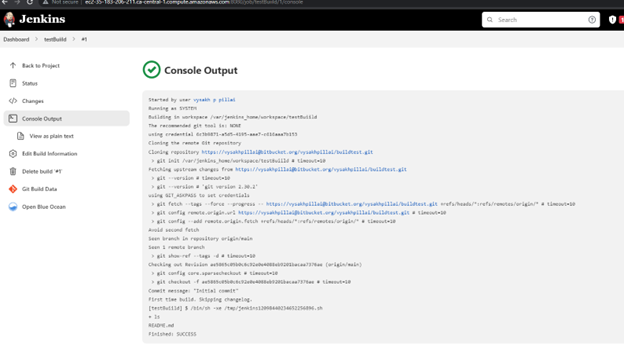
Test Job
Setup Webhooks
-
Go to the bitbucket repository and select webhooks under repository settings
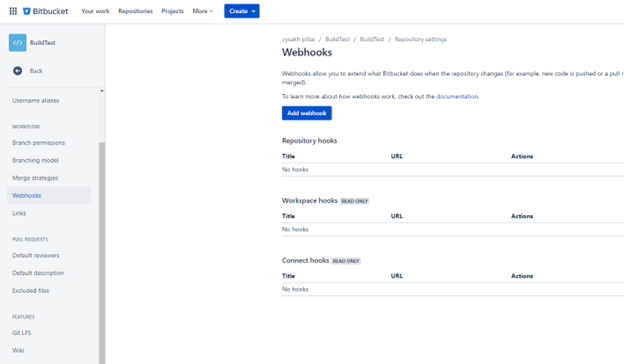
Webhooks
- Add a new webhook and enter the URL from the webhook template. Make sure that you add the actual server URL into the template.
- Make sure you add the token as a query parameter to the URL. Otherwise the webhook trigger will return a
404.- Query parameter
/invoke?token=TOKEN_HERE
- Query parameter
- Make sure you add the token as a query parameter to the URL. Otherwise the webhook trigger will return a
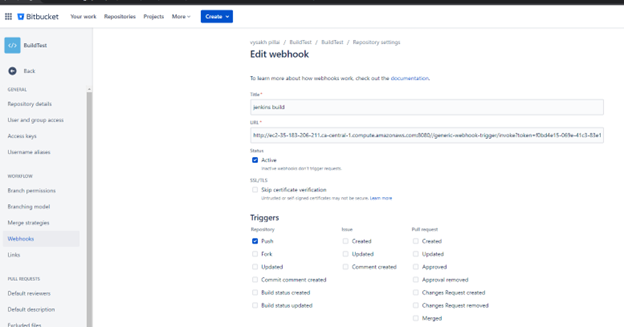
Configure Webhooks
-
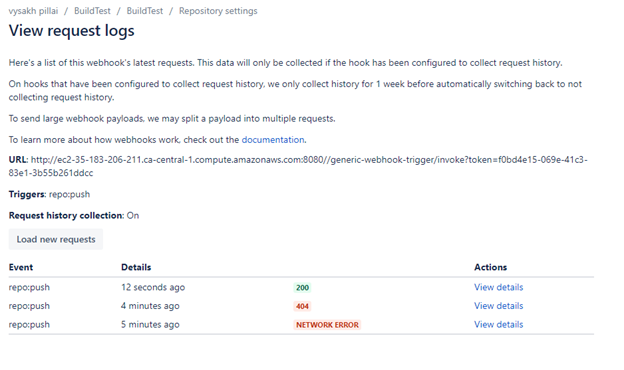
Click on
view requestsand enable requests history.

View Requests
- Now go to your repo and make a dummy change to trigger a webhook call to our Jenkins server
- I just edited the readme from the web IDE and added a newline to its end.
- In my first try, I got an error since I missed adding the port number (
8080) into the webhook URL, and the second one failed since the Token parameter was missing in the URL.
- In my first try, I got an error since I missed adding the port number (
- I just edited the readme from the web IDE and added a newline to its end.
Trigger Webhook
-
Now you can see that a new build has been triggered automatically in the Jenkins console
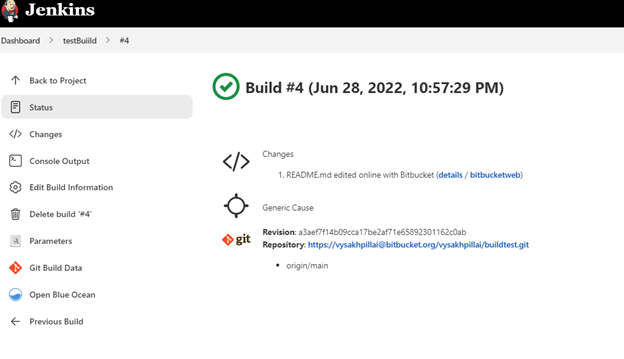
Jenkins Console
-
However, you could see that there is no build feedback given to bitbucket after the build. We will now set up build notifications.
-
Under the bitbucket webhooks page, click on view details and copy the request body. This is the contents posted into our Jenkins webhook by bitbucket on each trigger.
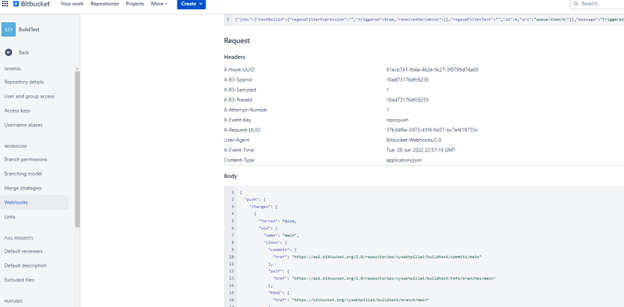
Webhook Request Body
-
We will use https://jsonpath.curiousconcept.com/ to explore and figure out the JSONPath expressions of the
commit ID,branch name, andchange actor.- Actor :
actor.display_name - commitID:
push.changes[0].new.target.hash- If you dont want to parse the post data for this, you can directly use $GIT_COMMIT
- branch:
push.changes[0].new.name
- Actor :
-
We need to extract now these variables from the
POSTcontents in the webhook. For this, go to the test build configuration and undergeneric webhook trigger>Post content parameters, clickAdd.-
Add the three variables and their paths we identified in the last step. One of them is shown here.
-
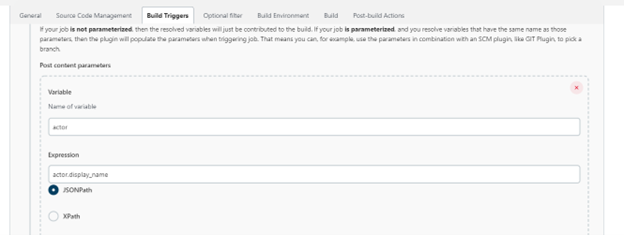
Add Parameters
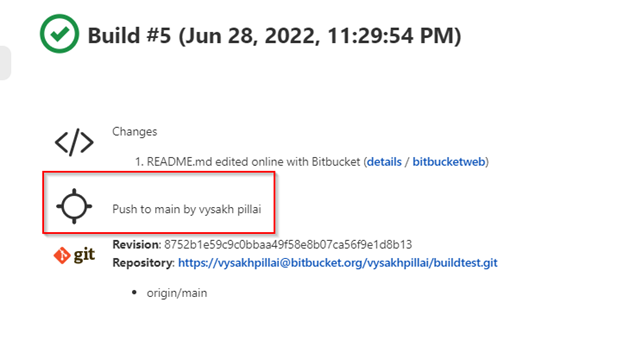
- Now, we can use these variables in entries like the cause string
- Change
generic CausetoPush to $branch by $actor
- Change
-
To test this, save the changes and trigger a test with a content change from bitbucket.
Test Job
Server Notification
- Now, let’s configure a build response to the server.
-
Under post-build actions of the job configurations, select “notify bitbucket instance”

Notify Bitbucket Post-Build
- Under advanced configurations, enter the bitbucket server URL, credentials, and commit ID.
- For commit ID, use the variable we extracted from the POST data using JSONPath.
- Alternatively, $GIT_COMMIT can also be used.
- For commit ID, use the variable we extracted from the POST data using JSONPath.
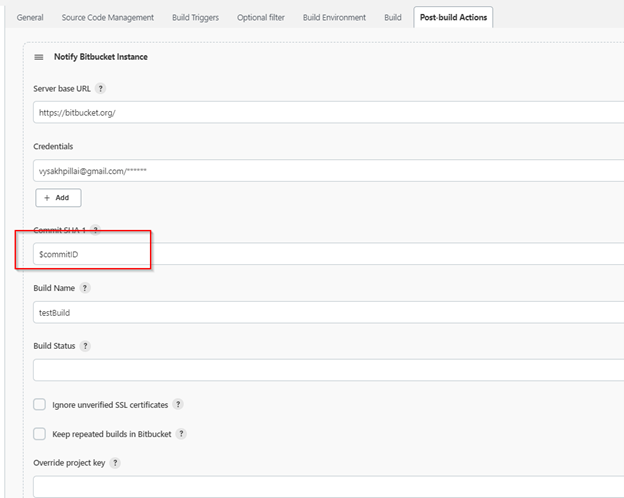
Configure Bitbucket Server
- This worked for my on-prem instance but is failing with bitbucket.org cloud since API access with username and password has been deprecated. I am yet to figure out how this can be worked around.
- I already tried the app password with username (instead of email) and SSH key, but it did not work. “Bitbucket Build Status Notifier” plugin relies on OAuth, but Bitbucket.org has also deprecated it.


Leave a comment